How can I reuse or recycle … big squash bottles?
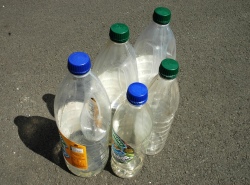 Mmm, orange squash. I go through a litre of it a week. I just can’t get enough of the water, orange fruit from concentrate (12%), Glucose-fructose syrup, sugar, citric acid, acidity regulator (Sodium Citrate), Preservatives (Potassium Sorbate, Sodium Metabisulphite), Sweeteners (Aspartame, Saccharin), Flavourings, Stabliser (E466), Vitamins (Niacin, Pantothenic Acid, B6, B12) and Colour (Beta-Carotene). Plus, a source of Phenylalanine? Mmmm-mmm.
The plastic bottles though, they’re not so tasty. I realise we’ve already brainstormed plastic milk bottles and water bottles but anything specially in mind for these babies, given they’re bigger and tougher?


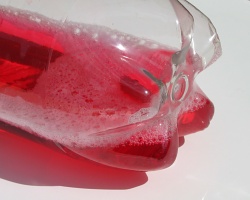

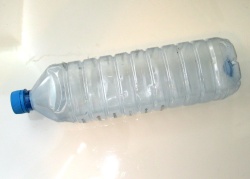
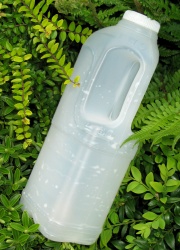



Since they nice and clear… fill with water and hang at the doorway or window to deter wouldbe flies entering.They see the reflections of a really enlarged bug and beat a retreat. in Spain they hang up plastic bags full of wanter but these bottles are more robust i think>
Rosie
U’ve got good pics, the site could use a tiny bit of work (no offense) its still awesome
1. cut tops off and pierce three drainage holes at base; put an inch of gravel in and fill with compost – they’ll grow three carrots per bottle on a windowsill if you have no garden (radishes, etc, also).
2. if you have a garden, cut the base off and pierce holes around the bottle’s sides and base randomly. Bury them lid-down (with lid on) in a hole in your garden’s veg-beds or flower-beds with a bit of grit or gravel mixed into the hole; once buried level with the ground, fill the bottles with horticultural grit or gravel.
Instead of watering the upper soil, put the water into these bottles instead and it goes to the roots, no evaporation form surface, far far more efficient way of watering your plot!
3. refill with tapwater and use as weights for toning upper arms and shoulders!
laura
Phenylalanine is an artificial sweetener. If the squash has sugar, it doesn’t need Phenylalanine.
Cut the tops of them, connect the bottoms to a curving pipe like the shape of a J, drill a hole in the lid and stick it on the other end of the pipe. Attach it to a wall near a plant and it will give the plant a constant sream of food (until the water runs out). Make an overflow pipe coming from your guttering and that will give it more water. A bit pointless when it rains but still creative.
half fill with water, pop in the freezer with lid on, remove when needed to stick in a picnic bag in order to keep food and drinks nice and cold. Three or four stacked neatly with beer cans will provide chilled beer for a barbie-Q.
you can use plastic bottles to bottle your homebrewed beer. it may seem a little less classy but it works great. Or, you can use them for making root beer or ginger beer if you dont partake or if you just aren’t into homebrew. There are millions of recipes and guides online and you can even get root beer making supplies and brewery and vintner supply stores.
refill with juice for taking on picnics
i been collecting milk bottles, detergent bottles, etc. since they are all coloured, i am planning on attaching them and feeding some lights through it. Hopefully, this will create a cool light fixture.
you can use big plastic bottles as cloches for protecting garden plants – just cut off the bottom of the bottle and put it over your plant. It’s good protection against frost and cold winds, and also against slugs and other predators.
if you have an outdoor pool, fill them with water, seal them, and freeze. when the pool water is too warm, throw them in.
reuse to make koolaid that needs to be portable. (like camping)
fill with sand, rocks, etc for an anchor.
fill with sand and keep in your truck in bad weather, the added weight is good, and if you’re stuck the sand/rocks might provide traction.
cut and use the top as a funnel.
cut and use as a scoop for kitty litter, sand, rock salt, etc.
seal and use as floaties to block off areas, or tie to small items on a boat, if they fall in, you can pull them up.
Cut off either the top or bottom allowing them to be “hooked” over a stick in the garden to keep away birds from your veggie patch.
This is used mostly on allotments, as the breeze makes them rattle against the stick and scare them off :)
Plastic Bottle Trellis:
http://www.diynetwork.com/diy/cr_garden_patio/article/0,2025,DIY_13757_5477970,00.html
Make vases out of them, I guess it’s better than the water bottle (since i posted this on the water bottle question as weel). But since these bottles are more robust , i guess they make a better vase :
Check out the last thumbnail in this link :
http://www.flickr.com/photos/reciclarte/sets/72057594113997025/
Using the larger bottles, cut the bottom off a few inches up. Set the legs of garage or basement storage units/shelves in the “cup”. If it is damp or your basement is leaky or rain came in the garage, the legs of the units will stay dry.
make a fly trap:
http://insected.arizona.edu/flyrear.htm
Have a game of polybottle rounders or cricket. use the larger ones with handles as bats and the smaller ones as “balls”.The batting team line up one behind the other. After hitting (or missing the ball, to get a rounder the batter must run round the line of batters.When the “ball” has been hit & caught/picked up by a fielder s/he raises their hand & all the other fields must line up behind them – the “Ball is then passed over & under & when the last one gets it s/he yells STOP,& the batter must stop running round their team.
I make life size people for my outdoor Halloween display. At first I made them out of cloth and cotton batting but took forever to dry when it rained and were very heavy to move around. Then I tried PVC pipe and wrapped that in old chair cushions cut up. Still took a long time to dry but was a little lighter. I needed something that didn’t get wet and was light enough to move around. So now I use plastic bottles to slip over the PVC pipe. A few nips and cuts here and there and I got a display that doesn’t get soaked underneath the clothes (clothes dry very fast), is light weight and resembles a persons body.
I use the big 2 litre ones to make self-watering seeding/seedling pots.
I cut them in half, cut 3-4 tiny holes around the mouth part 3-4 cm from the mouth itself where the neck widens (cap goes diretly into the recycling bin) – these are the drainage holes, place the mouth part inside the bottom part in such a way that they connect in the bottom (the bottle mouth should snugly cover the “bump” in the bottom). Here you have to cut down both pieces a bit to make them meet properly – the finished pot should be about 10 cm tall. The bottom part should have a hole cut near the opening (a couple of cm down the side), just big enough for the watercan, because this is where you add water.
I put a couple of small pieces of paper tape (masking tape) along the edge to keep the two parts together, but you *can* try and make them fit so well that they sort of lock together (I don’t have patience for this…).
Then you fill it up with potting soil, pressing down a bit extra in the mouth – this part will work as a wick sucking water from the outer part – and water well from the top. After a few hours the pot is ready to be sown/planted in, and from now on you water only through the hole in the side up to, but never above, the drainage holes on the inner part.
In these pots you can forget your seedlings for days without anything bad happening to them. You might experience algae in the water, but this can be avoided by placing the pots in a planter or covering their fronts with something that keeps the light from hitting the water in them.
Thanks in favor of sharing such a good thought, post is fastidious, thats why i have
read it completely